How to Use Spreadsheet in TrailBlazer
In this guide, we will delve into how you can use the spreadsheet component within TrailBlazer to explore and manage your data effectively.
Clearing/Deleting Values In SpreadSheet
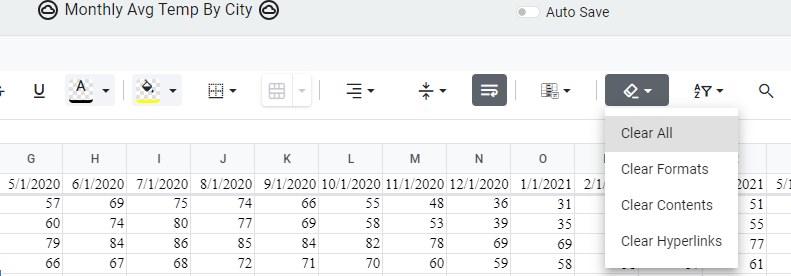
Tip: When deleting data from the sheet use the “Delete” button on your keyboard when selecting multiple cells to clear the values - using Backspac will only delete the main selected cell value.
Also you can use the “Clear All” Function within the Menu bar by clicking the Eraser Icon in the SpreadSheet Menu Bar
Data Formats within Spreadsheet
Using the correct data formats within the spreadsheet is imperitive for successfully running your forecasts.
Compatible Data Format
For TrailBlazer to work correctly, your spreadsheet data must follow these format specifications.
Orientation:
Data should be laid out horizontally, where each row represents a unique data item (e.g., product) over time, and each column corresponds to dates or timestamps.
Header Row:

The first row should be reserved for column names and dates.
Reserved Columns:
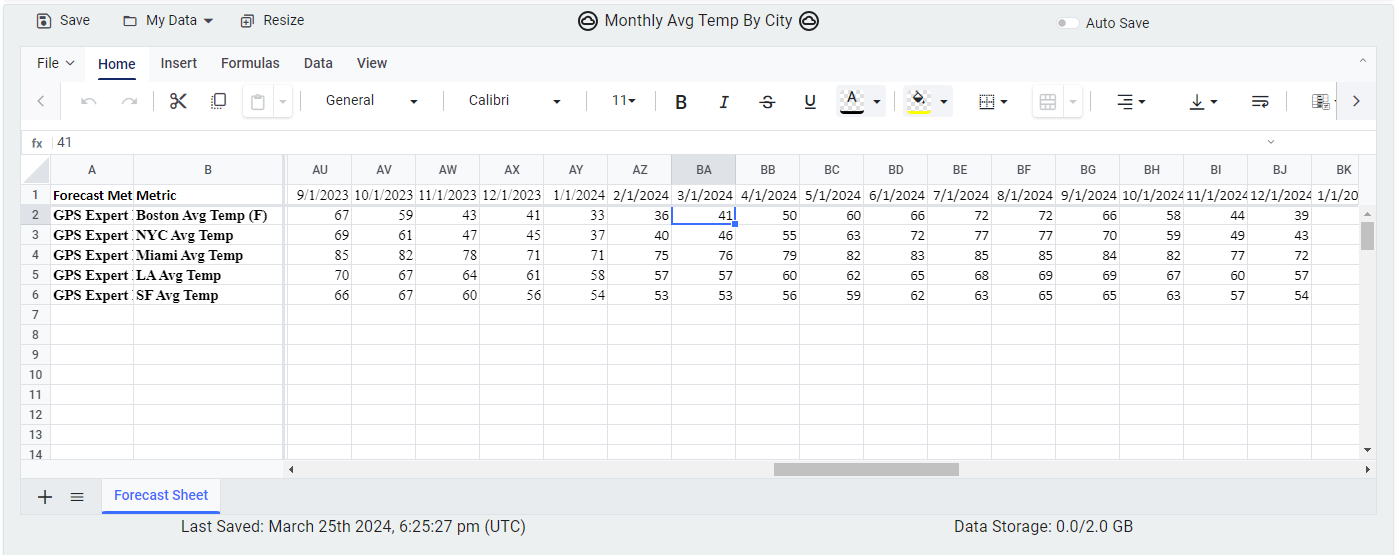
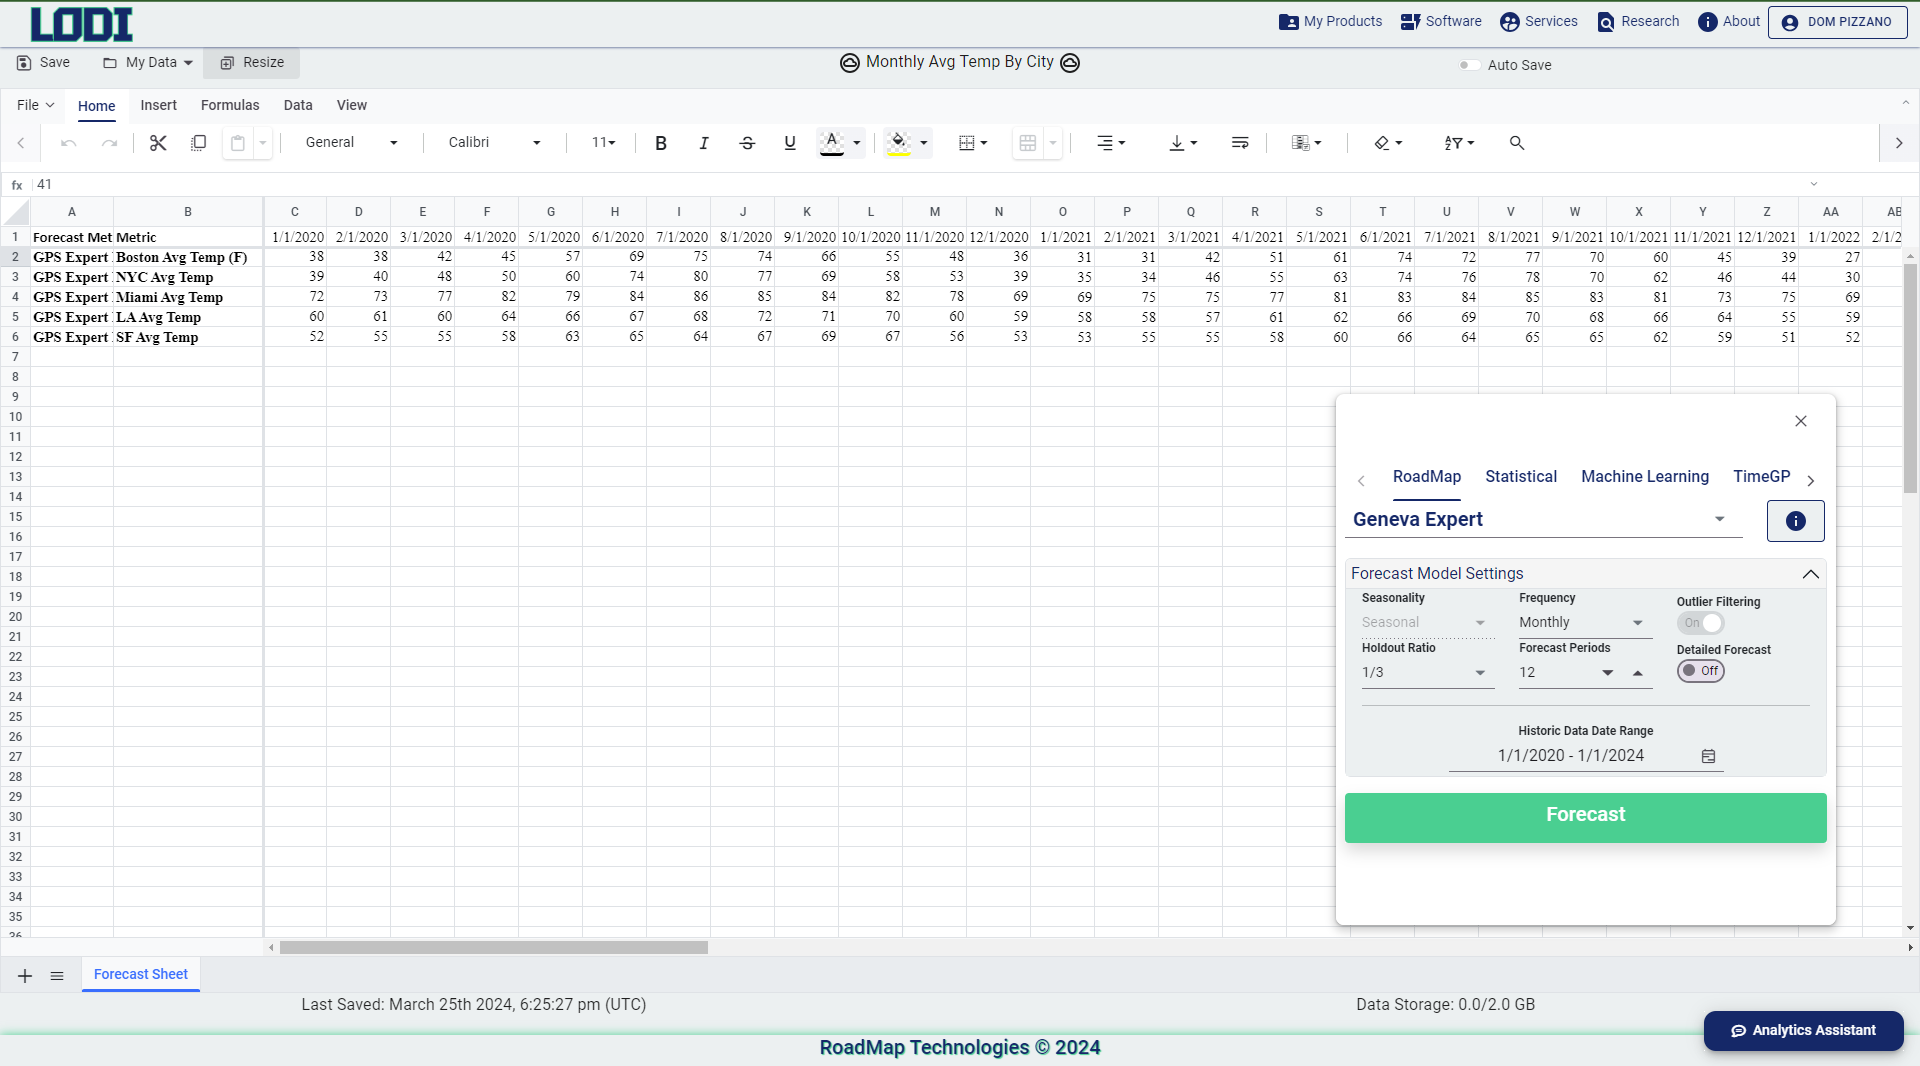
- First Column - “Forecast Method”: Displays the forecast model used after running a forecast. You can leave this column blank until a forecast is performed.
- Second Column - “Metric”: Displays unique identifiers for each row of data (e.g., names for each item/product for forecasting).
- Date Columns: Dates must be in chronological order from left to right. If rows of your data have different start and end dates, they need to be aligned according to the data header row.
Loading in New Data
There are several ways to load in your data into TrailBlazer in the correct format.
1. Edit Pre-loaded Template:
Initially, TrailBlazer provides a template with monthly average temperature data from 5 U.S. cities. Modify this by adjusting the dates, replacing metric names with your forecast items, and pasting your data. Before forecasting, update the frequency (for weekly data) and historical date range in the forecasting panel to match your dataset.
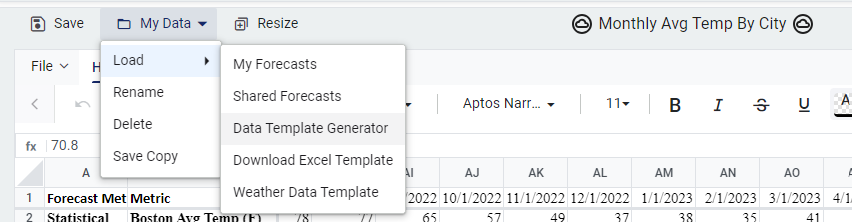
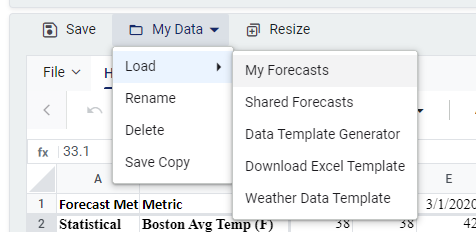
To revisit this example file later, go to My Data > Load > Weather Data Template.
2. Uploading Your Data:
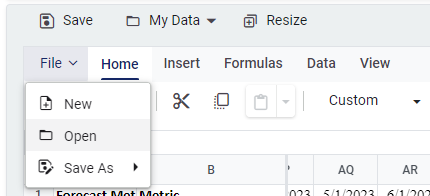
Upload a spreadsheet by selecting File > Open. Ensure your spreadsheet is in the correct format. Note that the data you wish to forecast must be on the first sheet — TrailBlazer’s current version only supports forecasting from the first sheet.
If you wish to work with the weather data template on your local device in Excel or another .xlsx editor, go to My Data > Load > Download Data Template. Edit the downloaded template on your machine as you wish while ensuring the correct format. You can then upload the edited sheet through File > Open.
3. Generate a Template
Go to My Data > Load > Data Template Generator.
The fields are:
- Sheet name
- Data type: month start for data with monthly frequency and dates on the 1st of each month, month end for data with monthly frequency and dates on the last day of each month, weekly for data with weekly frequency
- Date range
- Number of metrics (items) being forecasted. Note that these are not hard limits; you can add more rows of data as needed.
Save and Retrieve Your Previous Forecast Sheets
To save your forecasts and edits in our secure database, click the Save button located in the top left corner. You will see a “Successfully Saved” message, and the Last Saved timestamp below the spreadsheet will update to reflect the most recent save. You can now exit TrailBlazer securely without losing your progress.
To access previously saved sheets and resume forecasting, go to My Data > Load > My Forecasts. Use the dropdown menu to find your sheet by name and last edit timestamp, select it, and click “Load”.
Auto Save
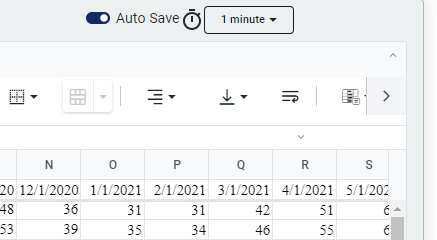
To avoid losing progress due to accidental exits, you can enable Auto Save in the top right corner. Adjust the auto-save frequency as desired. Your changes will then be automatically saved at this set interval. You will see a “Successfully Saved” message and an updated Last Saved timestamp.
Download Your Data and Edit Offline
Once you finish forecasting on a specific sheet and wish to download the data to your local device, go to File > Save As and choose the preferred format.
Share and Retrieve Shared Data
You can share your forecasts with other LODI users. Once you have completed forecasting and editing, click Save first to save all your changes. Next, go to My Data > Save Copy and enter the email addresses of the recipients.
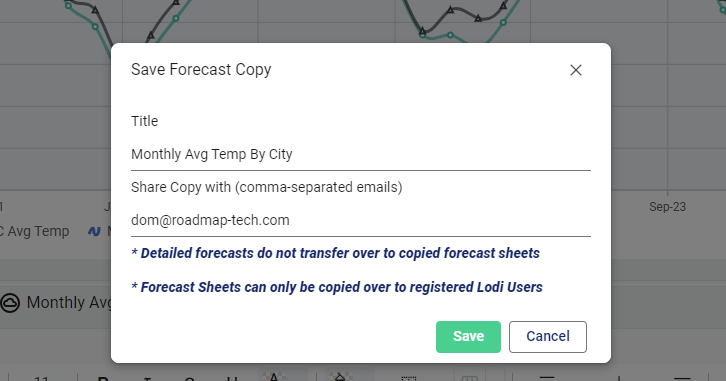
We recommend you change the title by, for example, appending “shared” to the original title, because this will generate a duplicate of your spreadsheet in your database that is shared with the recipients, helping you distinguish files stored locally in your database and the shared files. Please ensure that the recipient emails are registered LODI accounts and have purchased TrailBlazer. To share with multiple recipients, list their emails separated by commas.
Please note that if you make changes in the shared copy after the initial share and click Save without re-sharing, your recipients will not have access to the shared file. * If you do not want to share the changes you make after the initial share, edit the original copy instead of the shared duplicate. * If you wish to share the changes, save your changes and share again. To prevent flooding your recipients with multiple versions, keep the name of the shared sheet the same; they will then see only the latest version.
To access a spreadsheet shared with you, visit My Data > Load > Shared Forecast. If you make changes to the shared spreadsheet, make sure to click Save to save the edited copy to your database.
- Rename To rename the currently loaded sheet, go to My Data > Rename.
-
Delete To remove unnecessary sheets, go to My Data > Delete and select the sheets you intend to delete. Note that the delete action is not reversible!
-
Data Storage Each user is allocated 2GB of data storage. Your current usage can be viewed in the Data Storage section located below the spreadsheet. If this section displays 0.0GB despite having saved data, it simply means the files are too small to be recognized, not that they have not been saved. If you reach your storage limit, you may need to save important sheets to your local device and delete less important ones to free up space.
Here are some tips for using the spreadsheet within TrailBlazer to better explore your data.
Spreadsheet Full Screen Mode
To maximize your workspace, click Resize located in the top left corner. This will expand the spreadsheet to full screen mode. The forecasting panel remains accessible as a floating window.
Accessing Forecasting Panel In Full Screen mode: right click the sheet, and select the ‘Forecast’ option, right under Visualize Rows
To exit full screen mode, click Resize again.
Visualize Rows
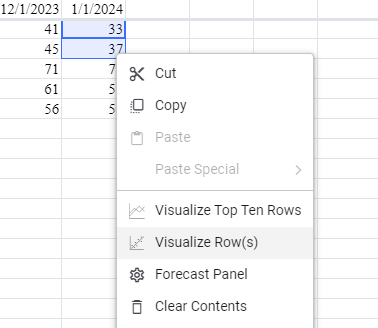
To visualize specific rows in the graph section, right-click on the selected rows and choose Visualize Row(s). You can also select Visualize Top Ten Rows for a quick visualization.
-
Insert & Delete Rows To insert a new row, right-click on the row number (in the row header) adjacent to the desired insertion point. When the menu appears, hover over Insert Row and choose either “Above” or “Below”. To delete a row, right-click on the row number you want to remove and select Delete Row. Note that rows must be deleted individually.
-
Clear Cell Values Select the cells you intend to clear and press the Delete key on your keyboard. Note that using the “Backspace” key will only delete the value in a single highlighted cell.
Enjoy Reading This Article?
Here are some more articles you might like to read next: